


Python TensorFlow 2.6获取MNIST数据的示例代码
更新时间:2024年04月09日 09:48:35 作者:深色風信子
这篇文章主要介绍了Python TensorFlow 2.6获取MNIST数据的的相关示例,文中有详细的代码示例供大家参考,对大家的学习或工作有一定的帮助,需要的朋友可以参考下
(福利推荐:【腾讯云】服务器最新限时优惠活动,云服务器1核2G仅99元/年、2核4G仅768元/3年,立即抢购>>>:9i0i.cn/qcloud)
(福利推荐:你还在原价购买阿里云服务器?现在阿里云0.8折限时抢购活动来啦!4核8G企业云服务器仅2998元/3年,立即抢购>>>:9i0i.cn/aliyun)
1 Python TensorFlow 2.6 获取 MNIST 数据
1.1 获取 MNIST 数据
获取 MNIST 数据
import numpy as np
import tensorflow as tf

from tensorflow.keras import datasets

print(tf.__version__)

(train_data, train_label), (test_data, test_label) = datasets.mnist.load_data()
np.savez('D:\\OneDrive\\桌面\\mnist.npz', train_data = train_data, train_label = train_label, test_data = test_data,
         test_label = test_label)
C:\ProgramData\Anaconda3\envs\tensorflow\python.exe E:/SourceCode/PyCharm/Test/study/exam.py
2.6.0

Process finished with exit code 0
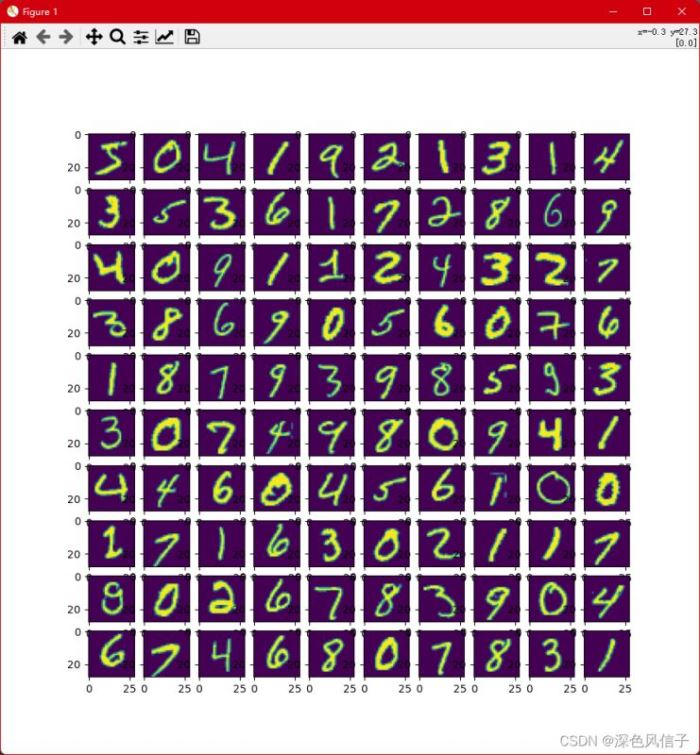
1.2 检查 MNIST 数据
import matplotlib.pyplot as plt
import numpy as np

data = np.load('D:\\OneDrive\\桌面\\mnist.npz')
print(data.files)

image = data['train_data'][0:100]
label = data['train_label'].reshape(-1, )
print(label)
plt.figure(figsize = (10, 10))
for i in range(100):
    print('%f, %f' % (i, label[i]))
    plt.subplot(10, 10, i + 1)
    plt.imshow(image[i])
plt.show()
2 Python 将npz数据保存为txt
import numpy as np

# 加载mnist数据
data = np.load('D:\\学习\\mnist.npz')
# 获取 训练数据
train_image = data['x_test']
train_label = data['y_test']
train_image = train_image.reshape(train_image.shape[0], -1)
train_image = train_image.astype(np.int32)
train_label = train_label.astype(np.int32)
train_label = train_label.reshape(-1, 1)
index = 0
file = open('D:\\OneDrive\\桌面\\predict.txt', 'w+')
for arr in train_image:
    file.write('{0}->{1}\n'.format(train_label[index][0], ','.join(str(i) for i in arr)))
    index = index + 1
file.close()

3 Java 获取数据并使用SVM训练
package com.xu.opencv;

import java.io.BufferedReader;
import java.io.FileReader;
import java.util.Arrays;
import java.util.HashMap;
import java.util.Map;

import org.opencv.core.Core;
import org.opencv.core.CvType;
import org.opencv.core.Mat;
import org.opencv.core.TermCriteria;
import org.opencv.ml.Ml;
import org.opencv.ml.SVM;

/**
 * @author Administrator
 */
public class Train {

    static {
        System.loadLibrary(Core.NATIVE_LIBRARY_NAME);
    }

    public static void main(String[] args) throws Exception {
        predict();
    }

    public static void predict() throws Exception {
        SVM svm = SVM.load("D:\\OneDrive\\桌面\\ai.xml");
        BufferedReader reader = new BufferedReader(new FileReader("D:\\OneDrive\\桌面\\predict.txt"));
        Mat train = new Mat(6, 28 * 28, CvType.CV_32FC1);
        Mat label = new Mat(1, 6, CvType.CV_32SC1);
        Map<String, Mat> map = new HashMap<>(2);
        int index = 0;
        String line = null;
        while ((line = reader.readLine()) != null) {
            int[] data = Arrays.asList(line.split("->")[1].split(",")).stream().mapToInt(Integer::parseInt).toArray();
            for (int i = 0; i < 28 * 28; i++) {
                train.put(index, i, data[i]);
            }
            label.put(index, 0, Integer.parseInt(line.split("->")[0]));
            index++;
            if (index >= 6) {
                break;
            }
        }
        Mat response = new Mat();
        svm.predict(train, response);
        for (int i = 0; i < response.height(); i++) {
            System.out.println(response.get(i, 0)[0]);
        }
    }

    public static void train() throws Exception {
        SVM svm = SVM.create();
        svm.setC(1);
        svm.setP(0);
        svm.setNu(0);
        svm.setCoef0(0);
        svm.setGamma(1);
        svm.setDegree(0);
        svm.setType(SVM.C_SVC);
        svm.setKernel(SVM.LINEAR);
        svm.setTermCriteria(new TermCriteria(TermCriteria.EPS + TermCriteria.MAX_ITER, 1000, 0));
        Map<String, Mat> map = read("D:\\OneDrive\\桌面\\data.txt");
        svm.train(map.get("train"), Ml.ROW_SAMPLE, map.get("label"));
        svm.save("D:\\OneDrive\\桌面\\ai.xml");
    }

    public static Map<String, Mat> read(String path) throws Exception {
        BufferedReader reader = new BufferedReader(new FileReader(path));
        String line = null;
        Mat train = new Mat(60000, 28 * 28, CvType.CV_32FC1);
        Mat label = new Mat(1, 60000, CvType.CV_32SC1);
        Map<String, Mat> map = new HashMap<>(2);
        int index = 0;
        while ((line = reader.readLine()) != null) {
            int[] data = Arrays.asList(line.split("->")[1].split(",")).stream().mapToInt(Integer::parseInt).toArray();
            for (int i = 0; i < 28 * 28; i++) {
                train.put(index, i, data[i]);
            }
            label.put(index, 0, Integer.parseInt(line.split("->")[0]));
            index++;
        }
        map.put("train", train);
        map.put("label", label);
        reader.close();
        return map;
    }

}
4 Python 测试SVM准确度
9.8% 求帮助
import cv2 as cv
import numpy as np

# 加载预测数据
data = np.load('D:\\学习\\mnist.npz')
print(data.files)

# 预测数据 处理
test_image = data['x_test']
test_label = data['y_test']

test_image = test_image.reshape(test_image.shape[0], -1)
test_image = test_image.astype(np.float32)
test_label = test_label.astype(np.float32)
test_label = test_label.reshape(-1, 1)

svm = cv.ml.SVM_load('D:\\OneDrive\\桌面\\ai.xml')

predict = svm.predict(test_image)
predict = predict[1].reshape(-1, 1).astype(np.int32)
result = (predict == test_label.astype(np.int32))
print('{0}%'.format(str(result.mean() * 100)))
C:\ProgramData\Anaconda3\envs\opencv\python.exe E:/SourceCode/PyCharm/OpenCV/svm/predict.py
['x_train', 'y_train', 'x_test', 'y_test']
9.8%

Process finished with exit code 0
以上就是Python TensorFlow 2.6获取MNIST数据的示例代码的详细内容,更多关于Python TensorFlow获取MNIST的资料请关注程序员之家其它相关文章!
相关文章
 CAPL是一种程序语言,其中程序块的执行由事件控制,主要介绍了如何在python中实现capl语言里的回调函数及事件函数的作用,需要的朋友可以参考下2022-08-08
 在Python中,绘图是一个非常有趣的领域,其中比较流行的绘图库就有?Turtle,所以本文就来讲讲如何在Python中使用它来创建和修改图形,需要的可以参考一下2023-06-06
 这篇文章主要介绍了python requests证书问题解决,文中通过示例代码介绍的非常详细,对大家的学习或者工作具有一定的参考学习价值,需要的朋友可以参考下2019-09-09
 今天小编就为大家分享一篇对python抓取需要登录网站数据的方法详解,具有很好的参考价值,希望对大家有所帮助。一起跟随小编过来看看吧2018-05-05
 这篇文章主要介绍了python 实现二维数组的索引、删除、拼接操作,具有很好的参考价值,希望对大家有所帮助。一起跟随小编过来看看吧2021-05-05
 这篇文章主要介绍了python psutil模块使用方法解析,文中通过示例代码介绍的非常详细,对大家的学习或者工作具有一定的参考学习价值,需要的朋友可以参考下2019-08-08
 这篇文章主要介绍了Python random模块常用方法,本文罗列了最常用的方法,需要的朋友可以参考下2014-11-11
Python边缘检测之prewitt,sobel和laplace算子详解
这篇文章主要为大家详细介绍了Python边缘检测中prewitt、sobel和laplace算子的使用方法,文中的示例代码讲解详细,感兴趣的小伙伴可以了解一下2023-04-04 这篇文章主要为大家详细介绍了使用python实现knn算法,具有一定的参考价值,感兴趣的小伙伴们可以参考一下2017-12-12
 这篇文章主要为大家详细介绍了Python绘制百分比堆叠柱状图并填充图案,文中示例代码介绍的非常详细,具有一定的参考价值,感兴趣的小伙伴们可以参考一下2022-04-04


最新评论