


Android实现粒子漩涡动画
更新时间:2024年01月03日 09:40:25 作者:时光少年
粒子动画经常用于大画幅的渲染效果,实际上难度并不高,但是在使用粒子动画时,必须要遵循的一些要素,起点,矢量速度和符合运动学公式等,文中有详细的代码示例供大家参考,具有一定的参考价值,需要的朋友可以参考下
(福利推荐:【腾讯云】服务器最新限时优惠活动,云服务器1核2G仅99元/年、2核4G仅768元/3年,立即抢购>>>:9i0i.cn/qcloud)
(福利推荐:你还在原价购买阿里云服务器?现在阿里云0.8折限时抢购活动来啦!4核8G企业云服务器仅2998元/3年,立即抢购>>>:9i0i.cn/aliyun)
前言
粒子动画经常用于大画幅的渲染效果,实际上难度并不高,但是在使用粒子动画时,必须要遵循的一些要素,主要是:
- 起点
- 矢量速度
- 符合运动学公式
起点之所以重要是因为其实位置决定粒子出现的位置,矢量速度则决定了快慢和方向,运动学公式属于粒子动画的一部分,当然不是物理性的,毕竟平面尺寸也就那么长,这里的物理学公式使得画面更加丝滑而无跳动感觉。
本篇将实现下面的效果
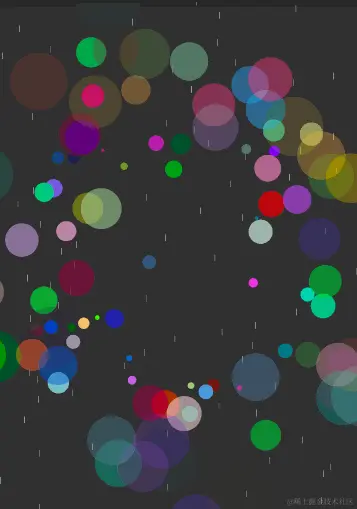
注意:gif图有些卡,实际上流畅很多
本篇效果实现
本篇效果是无数圆随机产生然后渐渐变大并外旋,另外也有雨滴,这里的雨滴相对简单一些。
首先定义粒子对象
定义粒子对象是非常重要的,绝大部分倾下粒子本身就是需要单独控制的,因为每个粒子的轨迹都是有所差别的。
定义圆圈粒子
private static class Circle {
    float x;
    float y;
    int color;

    float radius;

    Circle(float x, float y, float radius) {
        reset(x, y, radius);
    }

    private void reset(float x, float y, float radius) {
        this.x = x;
        this.y = y;
        this.radius = radius;
        this.color = Color.rgb((int) (Math.random() * 256), (int) (Math.random() * 256), (int) (Math.random() * 256));
    }
}
定义雨滴
private static class RainDrop {
    float x;
    float y;

    RainDrop(float x, float y) {
        this.x = x;
        this.y = y;
    }
}
定义粒子管理集合
private ArrayList<Circle> mParticles;
private ArrayList<RainDrop> mRainDrops;
private long mLastUpdateTime; //记录执行时间
生成粒子对象
- 生成雨滴是从顶部屏幕意外开始,而y = -50f值是雨滴的高度决定。
- 圆圈是随机产生,在中心位置圆圈内。
// 创建新的雨滴
if (mRainDrops.size() < 80) {
    int num = getWidth() / padding;
    double nth = num * Math.random() * padding;
    double x = nth + padding / 2f * Math.random();
    RainDrop drop = new RainDrop((float) x, -50f);
    mRainDrops.add(drop);
}

// 创建新的粒子
if (mParticles.size() < 100) {
    float x = (float) (getWidth() / 2f - radius + 2*radius * Math.random());
    float y = (float) (getHeight()/2f - radius + 2*radius * Math.random() );

    Circle particle = new Circle(x, y,5);
    mParticles.add(particle);
}
绘制雨滴
雨滴的绘制非常简单,调用相应的canvas方法即可
// 绘制雨滴
mPaint.setColor(Color.WHITE);
for (RainDrop drop : mRainDrops) {
    canvas.drawLine(drop.x, drop.y, drop.x, drop.y + 20, mPaint);
}

// 绘制粒子
for (Circle particle : mParticles) {
    mPaint.setColor(particle.color);
    canvas.drawCircle(particle.x, particle.y, particle.radius, mPaint);
}
更新粒子位置
雨滴的更新相对简单,但是圆圈的旋转是一个难点,一个重要的问题是如何旋转粒子的,其实有很多方法,其中最笨的方法是旋转Canvas坐标系,底层有很多矩阵计算,但是这个似乎使用Math.atan2(y,x)显然更加方便,我们只需要在当前角度加上偏移量就能旋转。
float angle = (float) Math.atan2(dy, dx) + deltaTime * 0.65f;
下面是完整的更新逻辑
// 更新雨滴位置
Iterator<RainDrop> rainIterator = mRainDrops.iterator();
while (rainIterator.hasNext()) {
    RainDrop drop = rainIterator.next();
    if (drop.y > getHeight() + 50) {
        int num = getWidth() / padding;
        double nth = num * Math.random() * padding;
        double x = nth + padding * Math.random();

        drop.x = (float) (x);
        drop.y = -50;
    } else {
        drop.y += 20;
    }

}

// 更新粒子位置
long currentTime = System.currentTimeMillis();
float deltaTime = (currentTime - mLastUpdateTime) / 1000f;
mLastUpdateTime = currentTime;

float centerX = getWidth() / 2f;
float centerY = getHeight() / 2f;

Iterator<Circle> iterator = mParticles.iterator();
while (iterator.hasNext()) {
    Circle particle = iterator.next();
    float dx = particle.x - centerX;
    float dy = particle.y - centerY;
    float distance = (float) Math.sqrt(dx * dx + dy * dy) + 4.5f;//  增加偏移
    float angle = (float) Math.atan2(dy, dx) + deltaTime * 0.5f;
    particle.radius += 1f;

    particle.x = centerX + (float) Math.cos(angle) * distance;
    particle.y = centerY + (float) Math.sin(angle) * distance;

    if (particle.radius > 10) {
        int maxRadius = 100;
        float fraction = (particle.radius - 10) / (maxRadius - 10);
        if (fraction >= 1) {
            fraction = 1;
        }
        particle.color = argb((int) (255 * (1 - fraction)), Color.red(particle.color), Color.green(particle.color), Color.blue(particle.color));
    }
    if (Color.alpha(particle.color) == 0) {

        float x = (float) (getWidth() / 2f - radius + 2* radius * Math.random());
        float y = (float) (getHeight()/2f - radius + 2*radius * Math.random() );
        particle.reset(x,y, 5);
    }

}
粒子刷新
其实刷新机制我们以前经常使用,调用postInvalidate即可,本身就是View自身的方法。
总结
本篇主要内容总体上就是这些,下面是全部代码逻辑
public class VortexView extends View {

    private Paint mPaint;
    private ArrayList<Circle> mParticles;
    private ArrayList<RainDrop> mRainDrops;
    private long mLastUpdateTime;
    private int padding = 20;

    public VortexView(Context context) {
        super(context);
        mPaint = new Paint();
        mParticles = new ArrayList<>();
        mRainDrops = new ArrayList<>();
        mLastUpdateTime = System.currentTimeMillis();
    }

    @Override
    protected void onDraw(Canvas canvas) {
        super.onDraw(canvas);
        float radius = Math.min(getWidth(), getHeight()) / 3f;

        // 创建新的雨滴
        if (mRainDrops.size() < 80) {
            int num = getWidth() / padding;
            double nth = num * Math.random() * padding;
            double x = nth + padding / 2f * Math.random();
            RainDrop drop = new RainDrop((float) x, -50f);
            mRainDrops.add(drop);
        }

        // 创建新的粒子
        if (mParticles.size() < 100) {
            float x = (float) (getWidth() / 2f - radius + 2*radius * Math.random());
            float y = (float) (getHeight()/2f - radius + 2*radius * Math.random() );

            Circle particle = new Circle(x, y,5);
            mParticles.add(particle);
        }

        // 绘制雨滴
        mPaint.setColor(Color.WHITE);
        for (RainDrop drop : mRainDrops) {
            canvas.drawLine(drop.x, drop.y, drop.x, drop.y + 20, mPaint);
        }

        // 绘制粒子
        for (Circle particle : mParticles) {
            mPaint.setColor(particle.color);
            canvas.drawCircle(particle.x, particle.y, particle.radius, mPaint);
        }

        // 更新雨滴位置
        Iterator<RainDrop> rainIterator = mRainDrops.iterator();
        while (rainIterator.hasNext()) {
            RainDrop drop = rainIterator.next();
            if (drop.y > getHeight() + 50) {
                int num = getWidth() / padding;
                double nth = num * Math.random() * padding;
                double x = nth + padding * Math.random();

                drop.x = (float) (x);
                drop.y = -50;
            } else {
                drop.y += 20;
            }

        }

        // 更新粒子位置
        long currentTime = System.currentTimeMillis();
        float deltaTime = (currentTime - mLastUpdateTime) / 1000f;
        mLastUpdateTime = currentTime;

        float centerX = getWidth() / 2f;
        float centerY = getHeight() / 2f;

        Iterator<Circle> iterator = mParticles.iterator();
        while (iterator.hasNext()) {
            Circle particle = iterator.next();
            float dx = particle.x - centerX;
            float dy = particle.y - centerY;
            float distance = (float) Math.sqrt(dx * dx + dy * dy) + 3.5f;//  增加偏移
            float angle = (float) Math.atan2(dy, dx) + deltaTime * 0.65f;
            particle.radius += 1f;

            particle.x = centerX + (float) Math.cos(angle) * distance;
            particle.y = centerY + (float) Math.sin(angle) * distance;

            if (particle.radius > 10) {
                int maxRadius = 100;
                float fraction = (particle.radius - 10) / (maxRadius - 10);
                if (fraction >= 1) {
                    fraction = 1;
                }
                particle.color = argb((int) (255 * (1 - fraction)), Color.red(particle.color), Color.green(particle.color), Color.blue(particle.color));
            }
            if (Color.alpha(particle.color) == 0) {

                float x = (float) (getWidth() / 2f - radius + 2* radius * Math.random());
                float y = (float) (getHeight()/2f - radius + 2*radius * Math.random() );
                particle.reset(x,y, 5);
            }

        }

        Collections.sort(mParticles, comparator);

        // 使view无效从而重新绘制,实现动画效果
        invalidate();
    }
    Comparator comparator = new Comparator<Circle>() {
        @Override
        public int compare(Circle left, Circle right) {
            return (int) (left.radius - right.radius);
        }
    };

    public static int argb(
            int alpha,
            int red,
            int green,
            int blue) {
        return (alpha << 24) | (red << 16) | (green << 8) | blue;
    }

    private static class Circle {
        float x;
        float y;
        int color;

        float radius;

        Circle(float x, float y, float radius) {
            reset(x, y, radius);
        }

        private void reset(float x, float y, float radius) {
            this.x = x;
            this.y = y;
            this.radius = radius;
            this.color = Color.rgb((int) (Math.random() * 256), (int) (Math.random() * 256), (int) (Math.random() * 256));
        }
    }

    private static class RainDrop {
        float x;
        float y;

        RainDrop(float x, float y) {
            this.x = x;
            this.y = y;
        }
    }
}
以上就是Android实现粒子漩涡动画的详细内容,更多关于Android粒子漩涡的资料请关注程序员之家其它相关文章!
相关文章
 这篇文章主要介绍了flutter 实现多布局列表的示例代码,文中通过示例代码介绍的非常详细,对大家的学习或者工作具有一定的参考学习价值,需要的朋友们下面随着小编来一起学习学习吧2020-02-02
 这篇文章主要为大家详细介绍了自定义布局实现仿qq侧滑Android部分代码,具有一定的参考价值,感兴趣的小伙伴们可以参考一下2017-03-03
 这篇文章主要为大家详细介绍了Android实现画画板案例,具有一定的参考价值,感兴趣的小伙伴们可以参考一下2019-01-01
利用SurfaceView实现下雨与下雪动画效果详解(Kotlin语法)
这篇文章主要给大家介绍了关于利用SurfaceView实现下雨与下雪动画效果的相关资料,需要一些基本的View知识和会一些基础Kotlin语法,文中给出了详细的示例代码供大家参考学习,需要的朋友们下面随着小编来一起学习学习吧。2017-09-09 这篇文章主要为大家详细介绍了Android实现带有记住密码功能的登陆界面,主要采用SharedPreferences来保存用户数据,感兴趣的小伙伴们可以参考一下2016-05-05
 Toast是Android中用来显示显示信息的一种机制,和Dialog不一样的是,Toast是没有焦点的,而且Toast显示的时间有限,过一定的时间就会自动消失。那么这篇文章跟大家分享下Android中Toast的优化,对大家日常开发还是很实用,下面来一起看看吧。2016-09-09
 这篇文章主要为大家详细介绍了学习Android自定义Spinner适配器的相关资料,感兴趣的小伙伴们可以参考一下2016-05-05
 这篇文章主要介绍了Android自定义view 你所需要知道的基本函数的相关资料,需要的朋友可以参考下2017-02-02
解决android.support.v4.content.FileProvide找不到的问题
这篇文章主要介绍了解决android.support.v4.content.FileProvide找不到的问题,具有很好的参考价值,希望对大家有所帮助。一起跟随小编过来看看吧2020-03-03
Android App中ViewPager与Fragment结合的一些问题解决
这篇文章主要介绍了Android App中ViewPager与Fragment结合的一些问题解决,重点讲解了如何更新及替换ViewPager中的Fragment,需要的朋友可以参考下2016-03-03


最新评论