


.NET?Core?分布式任务调度ScheduleMaster详解
(福利推荐:你还在原价购买阿里云服务器?现在阿里云0.8折限时抢购活动来啦!4核8G企业云服务器仅2998元/3年,立即抢购>>>:9i0i.cn/aliyun)
1.什么是ScheduleMaster
ScheduleMaster是分布式任务调度系统,是国内的一位开发者写的。简称:集中任务调度系统,最简单的理解ScheduleMaster,就是对不同的系统里面的调度任务做统一管理的框架。
例如我们现在有多个系统,每个系统针对自己处理不同的业务场景。衍生出自己的调度任务,想象一下,如果每个系统人为去维护,那随着调度任务越来越多,人是崩溃的吧,可见维护和技术成本是巨大的,这时我们需要选择分布式任务系统框架做统一的管理

当然有目前有很多相对优秀分布式任务系统框架,我们主要学习 ScheduleMaster
2.使用ScheduleMaster
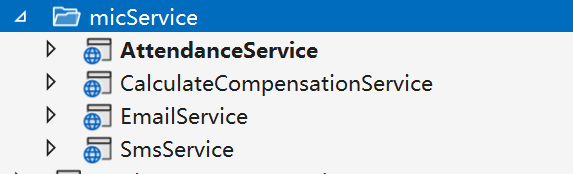
1.首先我们需要使用NET Core web Api创建几个模拟的微服务,分别为 考勤、算薪、邮件、短信
2.下载开源的ScheduleMaster,并且使用ScheduleMaster调度我们的微服务接口
- sqlserver:"Persist Security Info = False; User ID =sa; Password =123456; Initial Catalog =schedule_master; Server =."
- postgresql:"Server=localhost;Port=5432;Database=schedule_master;User Id=postgres;Password=123456;Pooling=true;MaxPoolSize=20;"
- mysql:"Data Source=localhost;Database=schedule_master;User ID=root;Password=123456;pooling=true;CharSet=utf8mb4;port=3306;sslmode=none;TreatTinyAsBoolean=true"
修改Host的配置文件和支持的数据库,框架默认使用Mysql
修改Web的配置文件和支持的数据库,框架默认使用Mysql
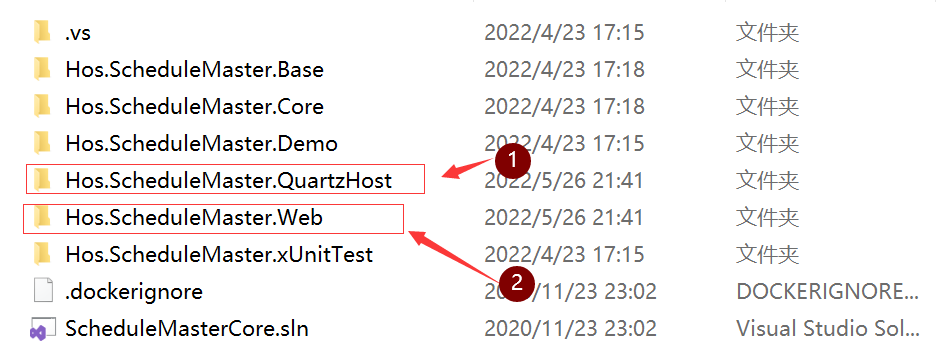
3.进入Hos.ScheduleMaster.Web项目的发布目录,dotnet Hos.ScheduleMaster.Web.dll启动项目 ,此时会生成数据库
登录账号:admin
密码:111111
4.进入Hos.ScheduleMaster.QuartzHost项目的发布目录,执行命令,启动项目
dotnet Hos.ScheduleMaster.QuartzHost.dll --urls http://*:30003
1.配置Http调度任务
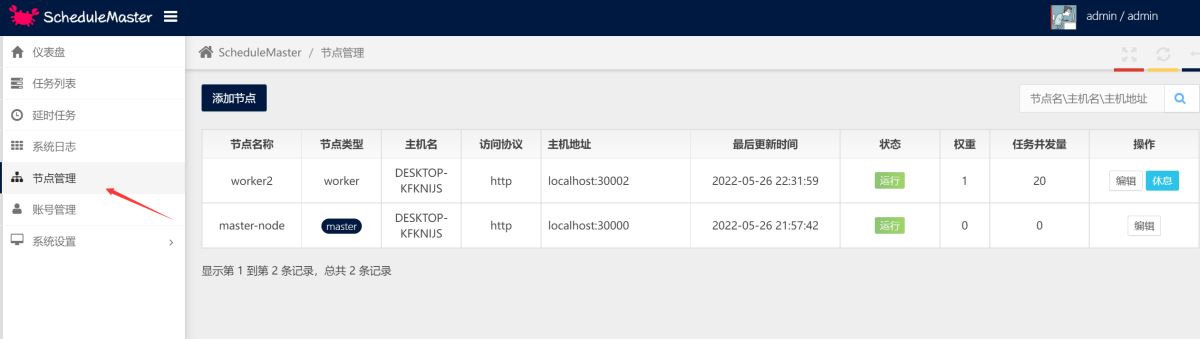
5.准备就绪后,使用后台查看节点管理,可以看到web主节点30000和任务调度的接口30002已经在运行
6.使用任务列表菜单,创建定时调度任务,配置基础信息和元数据配置,然后点击保存就开始执行任务

2.配置程序集调度任务
1.创建一个类库,安装ScheduleMaster库, 创建一个类继承TaskBase,实现抽象方法,然后编译程序集
namespace TaskExcuteService
{
    class AssemblyTask : TaskBase
    {
        public override void Run(TaskContext context)
        {
            context.WriteLog("程序集任务");
        }
    }
}
2.找到debug目录,去掉Base程序集,然后添加为压缩文件
3.在web界面找到任务配置,选择程序集进行基本配置,配置元数据,输入程序集名称,然后输入类,并将程序集上传,保存就可以运行了
3.使用Api接入任务
为了方便业务系统更好的接入调度系统,ScheduleMaster创建任务不仅可以在控制台中实现,系统也提供了WebAPI供业务系统使用代码接入,这种方式对延时任务来说尤其重要。
1.API Server 对接流程
- 在控制台中创建好专用的API对接用户账号。
- 使用对接账号的用户名设置为http header中的
ms_auth_user值。 - 使用经过哈希运算过的秘钥设置为http header中的
ms_auth_secret值,计算规则:按{用户名}{hash(密码)}{用户名}的格式拼接得到字符串str,然后再对str做一次hash运算即得到最终秘钥,hash函数是小写的32位MD5算法。 - 使用form格式发起http调用,如果非法用户会返回401-Unauthorized。
HttpClient client = new HttpClient();
client.DefaultRequestHeaders.Add("ms_auth_user", "admin");
client.DefaultRequestHeaders.Add("ms_auth_secret", SecurityHelper.MD5($"admin{SecurityHelper.MD5("111111")}}admin"));
所有接口采用统一的返回格式,字段如下:
| 参数名称 | 参数类型 | 说明 |
|---|---|---|
| Success | bool | 是否成功 |
| Status | int | 结果状态,0-请求失败 1-请求成功 2-登录失败 3-参数异常 4-数据异常 |
| Message | string | 返回的消息 |
| Data | object | 返回的数据 |
2.创建程序集任务
使用API创建任务的方式不支持上传程序包,所以在任务需要启动时要确保程序包已通过其他方式上传,否则会启动失败。
- 接口地址:
http://yourip:30000/api/task/create - 请求类型:
POST - 参数格式:
application/x-www-form-urlencoded - 返回结果:创建成功返回任务id
- 参数列表:
| 参数名称 | 参数类型 | 是否必填 | 说明 |
|---|---|---|---|
| MetaType | int | 是 | 任务类型,这里固定是1 |
| Title | string | 是 | 任务名称 |
| RunLoop | bool | 是 | 是否按周期执行 |
| CronExpression | string | 否 | cron表达式,如果RunLoop为true则必填 |
| AssemblyName | string | 是 | 程序集名称 |
| ClassName | string | 是 | 执行类名称,包含完整命名空间 |
| StartDate | DateTime | 是 | 任务开始时间 |
| EndDate | DateTime | 否 | 任务停止时间,为空表示不限停止时间 |
| Remark | string | 否 | 任务描述说明 |
| Keepers | List<int> | 否 | 监护人id |
| Nexts | List<guid> | 否 | 子级任务id |
| Executors | List<string> | 否 | 执行节点名称 |
| RunNow | bool | 否 | 创建成功是否立即启动 |
| Params | List<ScheduleParam> | 否 | 自定义参数列表,也可以通过CustomParamsJson字段直接传json格式字符串 |
ScheduleParam:
| 参数名称 | 参数类型 | 是否必填 | 说明 |
|---|---|---|---|
| ParamKey | string | 是 | 参数名称 |
| ParamValue | string | 是 | 参数值 |
| ParamRemark | string | 否 | 参数说明 |
HttpClient client = new HttpClient();
List<KeyValuePair<string, string>> args = new List<KeyValuePair<string, string>>();
args.Add(new KeyValuePair<string, string>("MetaType", "1"));
args.Add(new KeyValuePair<string, string>("RunLoop", "true"));
args.Add(new KeyValuePair<string, string>("CronExpression", "33 0/8 * * * ?"));
args.Add(new KeyValuePair<string, string>("Remark", "By Xunit Tester Created"));
args.Add(new KeyValuePair<string, string>("StartDate", DateTime.Today.ToString("yyyy-MM-dd HH:mm:ss")));
args.Add(new KeyValuePair<string, string>("Title", "程序集接口测试任务"));
args.Add(new KeyValuePair<string, string>("AssemblyName", "Hos.ScheduleMaster.Demo"));
args.Add(new KeyValuePair<string, string>("ClassName", "Hos.ScheduleMaster.Demo.Simple"));
args.Add(new KeyValuePair<string, string>("CustomParamsJson", "[{\"ParamKey\":\"k1\",\"ParamValue\":\"1111\",\"ParamRemark\":\"r1\"},{\"ParamKey\":\"k2\",\"ParamValue\":\"2222\",\"ParamRemark\":\"r2\"}]"));
args.Add(new KeyValuePair<string, string>("Keepers", "1"));
args.Add(new KeyValuePair<string, string>("Keepers", "2"));
//args.Add(new KeyValuePair<string, string>("Nexts", ""));
//args.Add(new KeyValuePair<string, string>("Executors", ""));
HttpContent reqContent = new FormUrlEncodedContent(args);
var response = await client.PostAsync("http://localhost:30000/api/Task/Create", reqContent);
var content = await response.Content.ReadAsStringAsync();
Debug.WriteLine(content);
3.创建HTTP任务
- 接口地址:
http://yourip:30000/api/task/create - 请求类型:
POST - 参数格式:
application/x-www-form-urlencoded - 返回结果:创建成功返回任务id
- 参数列表:
| 参数名称 | 参数类型 | 是否必填 | 说明 |
|---|---|---|---|
| MetaType | int | 是 | 任务类型,这里固定是2 |
| Title | string | 是 | 任务名称 |
| RunLoop | bool | 是 | 是否按周期执行 |
| CronExpression | string | 否 | cron表达式,如果RunLoop为true则必填 |
| StartDate | DateTime | 是 | 任务开始时间 |
| EndDate | DateTime | 否 | 任务停止时间,为空表示不限停止时间 |
| Remark | string | 否 | 任务描述说明 |
| HttpRequestUrl | string | 是 | 请求地址 |
| HttpMethod | string | 是 | 请求方式,仅支持GET\POST\PUT\DELETE |
| HttpContentType | string | 是 | 参数格式,仅支持application/json和application/x-www-form-urlencoded |
| HttpHeaders | string | 否 | 自定义请求头,ScheduleParam列表的json字符串 |
| HttpBody | string | 是 | 如果是json格式参数,则是对应参数的json字符串;如果是form格式参数,则是对应ScheduleParam列表的json字符串。 |
| Keepers | List<int> | 否 | 监护人id |
| Nexts | List<guid> | 否 | 子级任务id |
| Executors | List<string> | 否 | 执行节点名称 |
| RunNow | bool | 否 | 创建成功是否立即启动 |
HttpClient client = new HttpClient();
List<KeyValuePair<string, string>> args = new List<KeyValuePair<string, string>>();
args.Add(new KeyValuePair<string, string>("MetaType", "2"));
args.Add(new KeyValuePair<string, string>("RunLoop", "true"));
args.Add(new KeyValuePair<string, string>("CronExpression", "22 0/8 * * * ?"));
args.Add(new KeyValuePair<string, string>("Remark", "By Xunit Tester Created"));
args.Add(new KeyValuePair<string, string>("StartDate", DateTime.Today.ToString("yyyy-MM-dd HH:mm:ss")));
args.Add(new KeyValuePair<string, string>("Title", "Http接口测试任务"));
args.Add(new KeyValuePair<string, string>("HttpRequestUrl", "http://localhost:56655/api/1.0/value/jsonpost"));
args.Add(new KeyValuePair<string, string>("HttpMethod", "POST"));
args.Add(new KeyValuePair<string, string>("HttpContentType", "application/json"));
args.Add(new KeyValuePair<string, string>("HttpHeaders", "[]"));
args.Add(new KeyValuePair<string, string>("HttpBody", "{ \"Posts\": [{ \"PostId\": 666, \"Title\": \"tester\", \"Content\":\"testtesttest\" }], \"BlogId\": 111, \"Url\":\"qweqrrttryrtyrtrtrt\" }"));
HttpContent reqContent = new FormUrlEncodedContent(args);
var response = await client.PostAsync("http://localhost:30000/api/Task/Create", reqContent);
var content = await response.Content.ReadAsStringAsync();
Debug.WriteLine(content);
4.创建延时任务
- 接口地址:
http://yourip:30000/api/delaytask/create - 请求类型:
POST - 参数格式:
application/x-www-form-urlencoded - 返回结果:创建成功返回任务id
- 参数列表:
| 参数名称 | 参数类型 | 是否必填 | 说明 |
|---|---|---|---|
| SourceApp | string | 是 | 来源 |
| Topic | string | 是 | 主题 |
| ContentKey | string | 是 | 业务关键字 |
| DelayTimeSpan | int | 是 | 延迟相对时间 |
| DelayAbsoluteTime | DateTime | 是 | 延迟绝对时间 |
| NotifyUrl | string | 是 | 回调地址 |
| NotifyDataType | string | 是 | 回调参数格式,仅支持application/json和application/x-www-form-urlencoded |
| NotifyBody | string | 是 | 回调参数,json格式字符串 |
for (int i = 0; i < 5; i++)
{
    int rndNum = new Random().Next(20, 500);
    List<KeyValuePair<string, string>> args = new List<KeyValuePair<string, string>>();
    args.Add(new KeyValuePair<string, string>("SourceApp", "TestApp"));
    args.Add(new KeyValuePair<string, string>("Topic", "TestApp.Trade.TimeoutCancel"));
    args.Add(new KeyValuePair<string, string>("ContentKey", i.ToString()));
    args.Add(new KeyValuePair<string, string>("DelayTimeSpan", rndNum.ToString()));
    args.Add(new KeyValuePair<string, string>("DelayAbsoluteTime", DateTime.Now.AddSeconds(rndNum).ToString("yyyy-MM-dd HH:mm:ss")));
    args.Add(new KeyValuePair<string, string>("NotifyUrl", "http://localhost:56655/api/1.0/value/delaypost"));
    args.Add(new KeyValuePair<string, string>("NotifyDataType", "application/json"));
    args.Add(new KeyValuePair<string, string>("NotifyBody", "{ \"Posts\": [{ \"PostId\": 666, \"Title\": \"tester\", \"Content\":\"testtesttest\" }], \"BlogId\": 111, \"Url\":\"qweqrrttryrtyrtrtrt\" }"));
    HttpContent reqContent = new FormUrlEncodedContent(args);
    var response = await client.PostAsync("http://localhost:30000/api/DelayTask/Create", reqContent);
    var content = await response.Content.ReadAsStringAsync();
    Debug.WriteLine(content);
}
4.框架简单分析
1.全局设计
根据官网的设计图,以及操作的流程,简单总结一下任务全局流程为客户端—–>master——>work—–>执行任务。从大的架构方向的思想就是,将原有单个服务中业务和任务调度混合的方式做一些改变,使业务和调度分离,专门把任务调度部分剥离出来,作为一个独立的进程,来统一调用和管理任务,而原有服务只做业务处理。

2.Master和Work分析
我们主要从主节点,从节点,数据表这几个方面来简单分析,整个业务的时序流程,从本质来看并不复杂master和Work之间的关系是相互配合的,可能乍一看下面整个图有点混乱,下面来解释一下,其实Master节点将任务添加到数据中,然后work节点,去从对应的数据表中取出任务数据,然后根据任务对应的配置,生成配置信息,调用Quartz执行任务,这就是我们整个框架中最核心的业务。

当然master和work除了主要承载了整个管理系统的UI可视化、后台业务操作、任务执行之外,如果从细节以及实现方式来说主要做了以下事情:
Master
- 1.分配任务执行和选择节点
- 2.对work节点进行健康检查,对任务进行故障转移
Work
- 1.取出任务配置信息
- 2.使用Quartz根据配置运行任务
- 3.使用反射调用程序集
- 4.使用httpclient调用http 接口
到此这篇关于分布式任务调度ScheduleMaster的文章就介绍到这了,更多相关分布式任务调度ScheduleMaster内容请搜索程序员之家以前的文章或继续浏览下面的相关文章希望大家以后多多支持程序员之家!
相关文章
 这篇文章主要介绍了ASP和PHP文件操作速度的对比,需要的朋友可以参考下2020-08-08
 经常有些地方性的B2B或者B2C网站到处都被批量发布好多垃圾信息,把我的解决办法分享给大家2011-12-12
 asp 之上传漏洞终结篇...2007-03-03
 asp 网站静态化代码html,具体的功能大家可以测试下。2009-09-09
 不用模板只用ASP+FSO生成静态HTML页的一个方法...2006-09-09
 ASP 常见对象总结(熟悉一下利用以后的开发使用)2009-11-11
 自己的空间想做一个相册,找来找去用了picasa,功能很方便,唯一不足之处是获取外链太麻烦,一个一个的复制粘贴太辛苦,于是用asp+javascript的方法写了个简单的程序2009-05-05
 解决ASP(图像)上传漏洞的方法...2006-11-11
asp中Scripting.Dictionary字典对象使用示例
这篇文章主要介绍了asp中Scripting.Dictionary字典对象使用示例,本文包含创建、赋值、遍历、判断KEY等操作,需要的朋友可以参考下2014-08-08 使用ASP启动/停止指定WEB站点...2007-01-01


最新评论